Tips for Setting Up a Cage for Pet Mice: From Bedding to Supplies
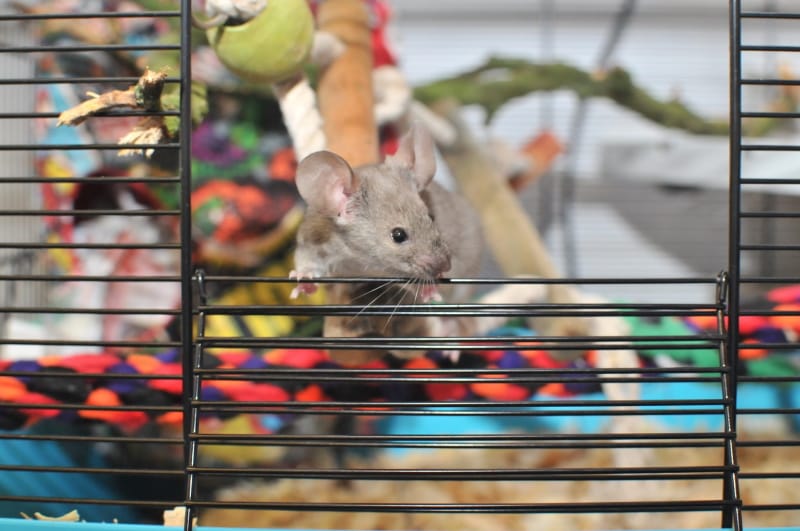
Most new cages either come as an empty shell, or will contain accessories which are cheap to mass-produce such as shelves, a small house, a wheel, perhaps ladders or tubes. These are never enough on their own to adequately enrich your pets’ lives, and often the items are too small and/or mildly hazardous to give to mice as they come, or simply a bad use of cage space.
Pet mice will spend the vast majority of their time each day in their cage, so it is important that the toys and accessories inside meet their behavioural needs and are stimulating.
A cage, even a big cage, is a limited amount of space, so it’s on us as their people to ensure that the mice who live there can get the most out of their space. In addition, an enriched setup for mice to live in is a fun cage for people to watch their pets – so you get more out of pet ownership too!
Mice cage supplies
Once you’ve bought your cage, the first step in creating one good mouse layout is to have what feels like enough toys and accessories to kit out the cage twice over. At a ‘just starting out’ basic minimum you want to own more bits and bobs than you can fit in the cage together.
Why though? Surely you’re only going to use the items you can fit in the cage?
Well, first of all, not all toys and accessories actually work well together in the cage in practice.
Having options and choices of what to use when actively creating a layout (vs shoving stuff in ad hoc) results in a better layout for happier and healthier mice, and is also more user-friendly when it comes to providing day-to-day care.
Secondly – cleaning! Mice do not take care of their toys in the way a house-proud human might. They chew them and they pee on them, and the really gross mice poo on them too. Each time you clean out the substrate in the cage, you will also need to clean the toys. Some people have the time and energy to wash and dry toys and then immediately put them back in the cage for continued use, but it’s much more common for busy owners to want to remove toys, put clean ones in instead, and then clean the dirty toys at a different time. This also allows for toys which need a more protracted cleaning and drying time, such as sending ropes and soft fabric toys through the washing machine, and hanging them up to dry.
Relating to the above, I also highly recommend investing in a horse wash bag.
These are specially designed large bags for machine washing soft fabric horse accessories; the fabric allows water and detergent to pass through, but not animal hair. Mice aren’t horses, but their toys and accessories do commonly end up coated in hair, or with pieces of substrate or fluff stuck to them. Rather than meticulously removing all of these bits before washing, or needing to arduously wash all fabric mouse toys by hand, you can pop mouse hammocks, beds, and ropes in the wash bag. This is both more hygienic for washing pet items in the same place you do your own laundry and means you don’t need to clean the machine filter nearly as often. To clean the bag between washes, simply hang it up to dry the right side out, and then once dry, invert over a bin and give a little shake.
It is also a good idea to have extra methods of attaching toys in the cage.
Many toys will come with their own clips, but these can deteriorate over time. Additionally, you may want extra attachment points on a toy rather than just one, or to adapt or create your own safe and fun toys. It’s easy to buy extra packs of various different clips online, or from DIY shops. Personally, I will also never be without my Cut-Anything Scissors and chew-proof rolls of plastic-coated garden wire. You need to take care that the ends of the wire are either outside of the cage or folded in on themselves, but this method is very eco-friendly as each bit of wire can be reused many times before being thrown out.
Setting up the cage
So you have your cage, you have a range of appropriate and enriching clean toys for your mice, and you have time put aside for the activity.
Substrate
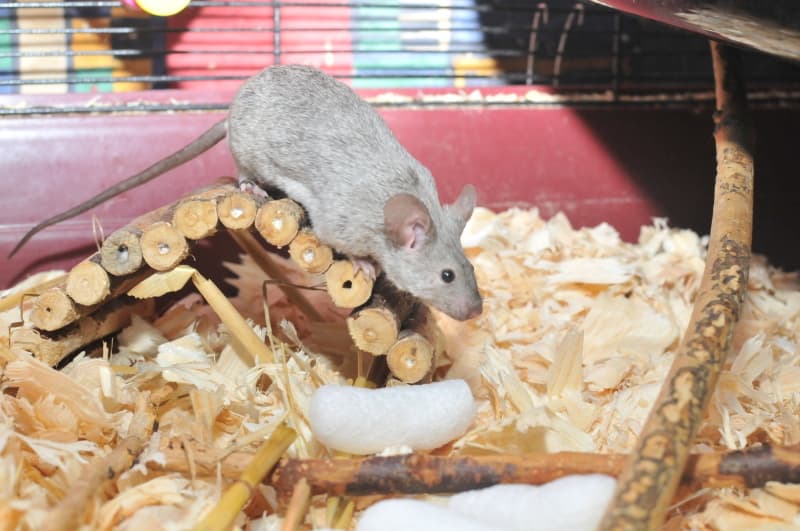
The first step for me is always the substrate, what’s happening at floor level. It instantly creates a more homely feel, rather than a stark environment. Plus, a decent depth of substrate (more than just a sprinkling for absorbency) takes up some vertical space, so it better allows you to see how much climbing space is available.
Then you want to put the cage in a good and accessible location, which might not be where the cage usually lives when the mice are inside it. Mice are small and you’ll be working at small scale, so you’ll need to be able to easily access all sides including the back panel. It’s much easier if you have free access to all parts of the cage rather than having to repeatedly move it backwards and forwards to access different areas. If you’re flexible then setting it up while sat on the floor can work very well. If not, then a clear table you can temporarily have in the middle of a room is perfect.
However please prioritise your own safety. Big cages with mouse-safe bars can be heavy enough when empty; when full of toys and suchlike they can weigh a tonne. Plan ahead to either have the help of another person to move the full cage into it’s permanent location, or ensure with test lifts that you are well within your own capabilities. It is safer to create your cage in situ with worse access than to place yourself in danger.
Large accessories
Next step is the big items which take up one big chunk of space.
- Wheels need to be placed so that they’re easy to clean, as most mice will pee on them at the very least. Will you be reaching inside the cage to clean in situ, or will you be regularly removing the wheel from the cage to clean? Answers will depend on size of wheel, type of wheel attachment, and how big your cage doors are – but decide this now in advance.
- Are you going to include any shelves? For happy, healthy, active mice big expanses of flat shelves aren’t the best use of space, but shelves with a bit of depth where you can put extra substrate inside can be great. If you’re going to include anything like this you’ll want to include them now – if you try and do so later on you’ll only have to remove/ rejig later toy additions as you’ll have accidentally placed other bits in the gaps. As with wheels I like to ensure that any shelves are easy to clean, as chances are I will be leaving them in the same place in the cage for an extended time.
- I always like to plan the group’s main enclosed sleeping bed location next. Will it be a cardboard box on the floor, for those mice who prefer below ground sleeping? Will it be a hanging cube bed? This main shared bed is a key resource for mice, so putting it in early helps ensure you create good levels of mousey access.
- Do you have any large parrot accessories? I have a few chunky wooden parrot ladders which my mice really enjoy. They are on wire so you can shape them a little to fit the dimensions and available space in your cage, but this is easiest to do when there’s not really anything else to get in the way. Ditto with any large and solid floor-based accessories. Don’t figure out all of the floor, just the big stuff that will stay in position.
Look at your cage now. It looks alright? This is what cages in pet shops look like – actually, it’s probably better than cages in most pet shops. I’m done now! WRONG. This is where the fun starts; for both you and your mice!

From here on in you sort of want to pretend you’re a mouse.
Humans are big, we are clunky, we are relatively clumsy. Mice are petite and very agile. Remember it is them living in their home, not you: instead of looking at the space from your own point of view, try and look at it from your mice’s perspective. You will have ideas as to what certain toys should be used for and how, but really it’s the mouse’s prerogative what they do. Think about how they will use the space. How would a mouse get from point a to point b? What’s the quickest way? What would be the most fun way? Which of these options promote healthy mouse behaviours like running, balancing, jumping, and climbing? Plus the sides of the cage aren’t just the walls we have in our own houses, they are full on 3D ladders to be climbed up, down, and any which diagonal way.
Long accessories
Long and relatively thin accessories are the next ones to add: mouse super highways, if you will, to take them between the bare bones infrastructure already in place. These are things like branches and your longest or wackiest shaped ropes. Look at the key areas in your cage and use your long toys to link them together. Measurements don’t have to be exact – branches can stick out between the cage bars a little to secure them in place, or some species twigs will be more flexible and can be wedged into a corner. Your rope doesn’t quite stretch? Pretend you planned it, so as to involve a stretch and a jump in the route as well as walking. Your rope is too long? Double it back, zigzaging all over the cage. Now rather than one big space to fill, you’ve created lots of smaller areas – and smaller areas are easier to fill without losing momentum.
The first smaller areas I like to look at are by the cage doors. Many mice will happily climb up the cage to get to the open door for interaction, and this works very well in many cages. However what can also work very well, especially for less confident mice, is to provide a rest stop by door (especially the main door you will be opening each day for handling and other interactions). If you thought ahead to this already you may well have a rope there-and-back corner attachment in the doorway. If not, small perches and ledges can work neatly too.
Ledges and perches
Leading on from this, I then like to put in any other ledges and perches around the cage perimeter. Is access around the bed area okay? Which routes already exist for mice to get into and out of bed? Do I want to make any gaps smaller? Or how about this big empty expanse at the back; I could put in a series of perches to create an open staircase of hops and jumps. If you have any smaller or shorter ropes or twigs these can be good to add too, especially across corners.
By now your main mouse thoroughfares from one key resource to another should mostly be done, but take a look again from a mouse’s point of view. If you have any big gaps in the middle then this can be the perfect space in which to put in a flat hammock or rope cargo net. Attaching these to the bars is the expected option, but for mice and their low body weight especially, you can easily get away with clipping or tying hammocks onto ropes as they crisscross the cage.
Smaller accessories
The last things to do are to add in the smaller accessories:
- a water bottle,
- a coop cup water bowl on the side,
- chew toys,
- any extra tubes or smaller toys at ground level.
And of course, don’t forget to add your mice, who have been patiently waiting in their carrier!

End note
The first few layouts you will create in any given cage are difficult. You’ll spend extra time learning which toys of what dimensions work well in the space, and you’ll be learning how your own individual mouse personalities use their space. Human house and home differences are also relevant; where in your home do your mice live, what human furniture is nearby and therefore which parts of the cage are most viewable for you to watch your mice, which door(s) will you use for main access. Even things as simple as how tall you are and how long your arms are can influence whether a layout idea will or will not work for you. All of these variables mean that a certain layout and use of toys can work really well for one person and their pet mice, but not so great for yourself and your pet mice.
Seeing how other people who own the same cage as you have used the space can help with ideas, but it’s always best to create layouts yourself rather than rigidly copying others. Even when you’re very expert in setting up enriching homes for your mice, should you upgrade to a new cage, or buy a new cage for a second group of mice, there will be new challenges to overcome. A cage door in a slightly different place can mean one of your go-to toy sequences no longer quite works. It can be frustrating on a personal level, as you want to reap the rewards of the new space immediately. My best advice here is to persevere. Perhaps set yourself the challenge of creating a brand new layout each clean out as opposed to only moving around the smaller items. Each time, you’ll gain useful new insights and with practice, will be able to quickly plan and set up layouts – soon you’ll be a pro.
